Building and using a tripod Panorama head
 Like most photography nerds, I have at times experimented with making composite panorama photos
out of multiple images - even well before digital cameras entered the scene.
Digital, of course, opened the exiting prospect of making perfect panorama photos, without using
any scotch tape to tape prints together with afterwards.
Like most photography nerds, I have at times experimented with making composite panorama photos
out of multiple images - even well before digital cameras entered the scene.
Digital, of course, opened the exiting prospect of making perfect panorama photos, without using
any scotch tape to tape prints together with afterwards.
But as it turns out, despite the theoretical possibility of perfect panoramas, in actual practice perfect panoramas are very hard to come by. At least they are rarely realized with the usual combination of hand held shots stitched together with whatever stitching software comes with the digital camera.
While I had heard of things like panotools, I initially decided that perhaps the software that came with my Canon Pro1 was just not good enough at dealing with errors in geometry, and that I just needed to shoot better aligned photos, and perfect panoramas would be mine.
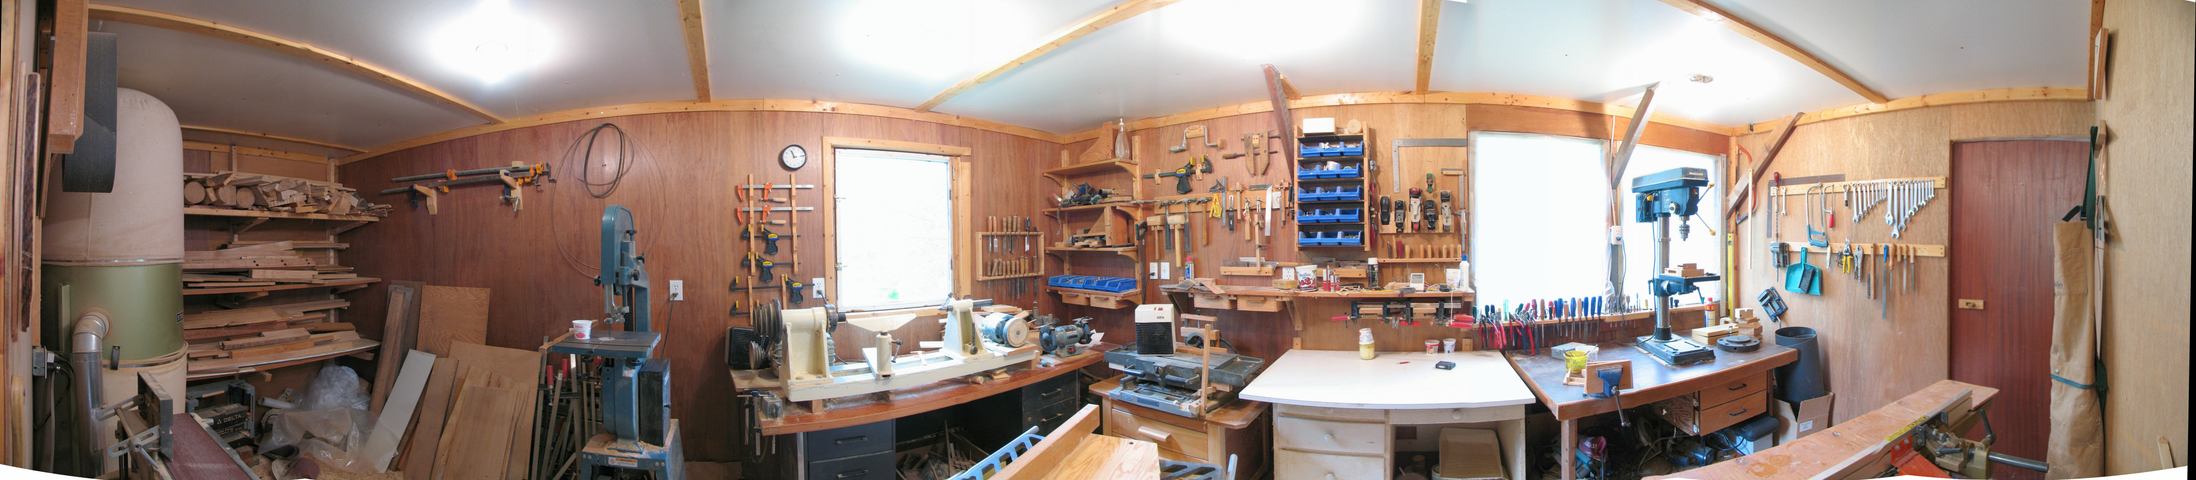
So I built a panorama head out of wood in my workshop, and did a 270 degree panorama inside my workshop with it. When I stitched the result with Canon's software, I found the result to be much improved compared to hand held photos, but still wanting in terms of problems at the transitions between photos. Of course, I was going for a very challenging shot - indoors, with objects nearby, and with the individual photos zoomed all the way out and upright. This makes for a much wider connection between the photos. Also, the barrel distortion in the Pro1's lens is worst when zoomed all the way out. And it turns out, the canon software doesn't correct for barrel distortion in the lens. This was disappointing - seeing that the software came with that camera, they could have easily made it aware of the lens distortion inherent in that camera.
So then I started looking into panorama stitching tools - something based on panotools. there is a lot of material on the web - perhaps too much. It was hard to figure out what I wanted, and what was definitive. I didn't want to use a non-free solution at first, but couldn't find anything that worked really well. Eventually, I tried PTAssembler, which is a non-free tool with a 30 day evaluation. Playing with the evaluation copy of the tool really allowed me to understand the philosophy behind tools like panotools. Even if you are a GNU software fanatic, I recommend you download an easy to use non-free tool first, just to get the hang of how panotool based stitching works.
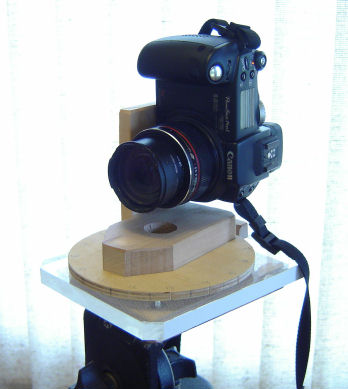
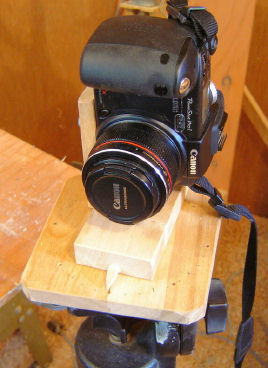 |
| My original panorama head attempt |
Panotools calculates the camera orientation, as yaw, pitch, and roll for each image as part of the process. (Roll Pitch and Yaw are terms used in aviation to describe the orientation of an aircraft in flight. While a bit confusing to the uninitiated, these terms are at least unambiguous in their meaning)
I expected my photos to have a fair bit of inconsistency in terms of yaw (rotating along the vertical axis), because my first panorama head (see right) only had a pointer to line up with various markings, I was a bit surprised to find I had several degrees variation in pitch and roll. I realized this was because the base of my panohead was not completely flat. It wasn't even made of plywood.
I knew that non-flatness of the base would lead to pitch and roll errors. So I decided to build another panorama head. My goal for this one was to make it accurate so that I could use a fixed set of geometry parameters to merge the images with. This way, I could just run a non-interactive script and have perfect panoramas, without the hassle of setting control points and all.
Second attempt
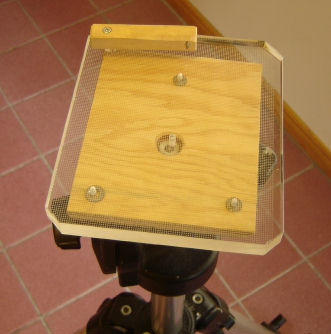 |
| Base for my second panorama head |
On top of this base is rotates the head, or turret. The head has only three points where it rests on
the base, so that it will always rest on the base in the same repeatable way.
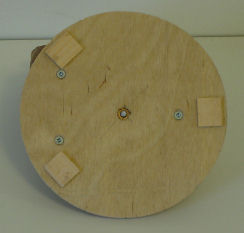
A screw going through the middle of the round top goes through the plexiglass, with a spring to hold it down with a light amount of tension. The head consists of a disk that is cut perfectly round. To make sure I could get repeatable angles (to get repeatable yaw on my images), I cut 16 slight notches into the disk with a spacing of 22.5 degrees. The small lever you can see at the back end of the base for the panorama head is used to push a metal tab into the notches, to repeatably set the angle of rotation of the head. At least that was the theory.
The results were reasonably good. With my first try, I had quite a bit of variation in roll and pitch, but plotting these, I realized the variation was actually a sinusoid, as a function of yaw. I realized this was due how the reference image was chosen. Imagine the plate not being quite level with respect to the horizon. Even though it will be flat, the elevation and roll of the horizon as seen looking over the plate pitch will vary depending on which direction (yaw) you look over the plate from. And it doesn't have to be the plate that is not level. For shots where the horizon is not obvious, it could be that the defined horizon is crooked. At any rate, after much playing around and tweaking the angle of the reference image, I managed to get the pitch within and roll each within a range of 0.3 degrees.
I never expected the spacing of yaw between images to be precisely 22.5 degrees, but I did hope that between panorama shots, if I set the camera to the same notches each time, the inconsistency would be repeatable. If all geometry were perfectly repeatable, I would just be able to use a fixed panorama stitching script without having to go through the trouble of picking control points and optimizing the result. But experiments on that turned out not to be as lucky. And even the pitch variation of a fraction of a degree turned out to be a little annoying. So the fixed script idea did not work out.
However, with this panorama head, I can control the geometry sufficiently well that I can just run a simple script on my images individually, and convert each one to cylindrical perspective, while also compensating for lens distortion. I could then just paste the resulting images side by side with Gimp. This is not quite ideal, but the remaining errors can easily be compensated for by shifting the image slightly while pasting it in gimp, until everything aligns nicely. This works pretty good, especially because my trial version of Ptstitcher has expired, and this is less work than setting control points and all.
I use the following scripts (sorry, I'm a windows weenie, and I use batch files)
wrapem.bat
mkdir cylindrical
FOR %%I IN (IMG_*.JPG) DO (
    ptstitcher.exe -o cylindrical\%%I cylwrap.txt %%I
)
The ptstitcher.exe program is the stitcher - a free component, included in Ptassmblr.
The file cylwrap.txt specifies the transforms that need to be applied. This is basically part of the script that Ptassmblr created to process my images.
cylwrap.txt
# Cylindrical perspective wrap one image from portrait, full wide angle on pro 1

# Properties of output image
p f2 w1200 h1600 v50  n"JPEG q90"
m g1 i0 f0

# Parameters for just one source image
o w1704 h2272 f0 a0.0256 b-0.0719 c0.0162 d0 e0 g0 p0 r0 t0 v49.3489 y0  u10 m0
If you have a Canon Pro1 digital camera, and use it zoomed all the way out, the lens distortion parameters from cylwrap.txt may work pretty good for your camera already. Although its conceivable that my camera differs from yours slightly - I have disassembled and reassembled the lens to get a speck of dust out of the optics.
What you get from this is images that look like these:
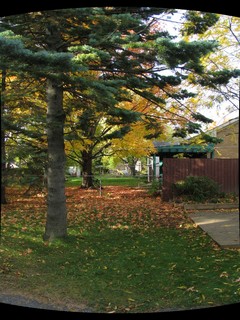
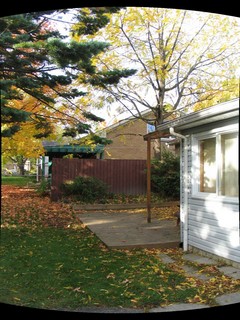
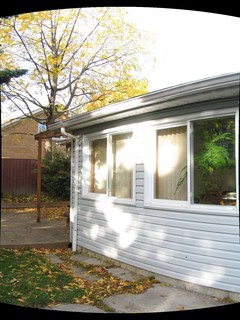
The roundness at the top and bottom is due to conversion to cylindrical perspective. Note the large amount of overlap - this is deliberate. The lens gets progressively worse towards the corners, and this way, I could avoid using that part of the images.
Once pasted together, the results and remaining imperfections are small enough that to show them would require images bigger than I can put on my limited web space. The image below was taken with my first panorama head, and using just the canon photo stitching software. You can barely see the flaws if you view the larger image, but when zoomed in to original size, the flaws are quite annoying. But still even with a not very accurate panorama head, the results generated by the simple panorama stitcher included with the camera are already much improved.
Outdoor panoramas are much more forgiving. Its all a matter of how much of a quest for perfection you have, or maybe just how long the quest lasts until you can live with the imperfections!
Other photo related stuff on my website